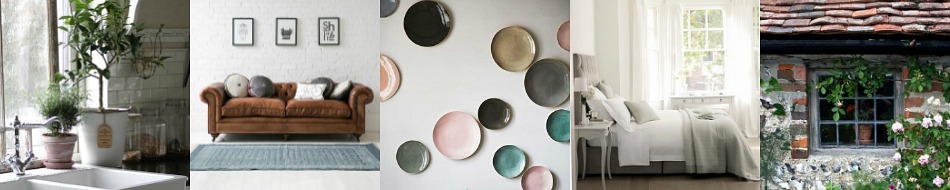
I have Kitchen Envy. Anyone who knows me knows that I lament my kitchen. Whenever I visit a home for the first time (or second or tenth) I can often be caught hyperventilating in the corner as I gasp in awe at their kitchen. I try to be discreet as I look around; taking in the details, my mind immediately begins to work overtime. I briefly entertain the idea of magically transporting their kitchen into my home. Do you think they would notice? Slightly disillusioned I go home and look around, sadly. If only I could knock down a wall or replace the floor or make it just, well, better. Then (this is the odd part) I immediately fell guilty for inflicting such disdain onto my small, unpretentious 1930's kitchen.
My kitchen and I first met in 1991. It is very small, about 8 feet by 10 feet with three entrances leading into it. It has one small window over the sink. The refrigerator, when opened, blocks one door, the dishwasher, when opened, blocks another and a cabinet door can easily block the last entrance. The fridge and oven are side by side and the sink is on the opposite wall. The microwave sits by the telephone. It is a maze of disorganization in which I am often spinning from area to area like a confused, plus-sized ballerina.
When I moved in it had yellow, peeling linoleum on the floor and orange and yellow calico wallpaper. The countertops were a bright sky blue and the cabinets were oak with rectangular brass handles. Pretty standard fare for a house that was from the 1930's but was last renovated in the late 70's.
The first thing I did was to try and remove the wallpaper. Unfortunately there were several other layers of wallpaper underneath. As I investigated the last layer I could glimpse the bathroom wall on the other side. I hastily patched the wall and tried to forget what I had seen. My solution was to put up pretty flowered wallpaper that matched (?) the blue countertop. It instantly brightened the room but I tired of the wallpaper almost before I had finished putting it up.
Next I decided to get the floor redone. Peeling yellow vinyl linoleum was replaced with more white vinyl linoleum. Don't ask me what I was thinking; my plan was to lighten it all up, and to have as much white as possible seemed to be the right solution at the time. The white linoleum lasted for about a year, until I decided I wanted slate on the floor. Not being able to afford slate I got slate colored press on tiles instead. To be fair to the tiles I have had them about 15 years and I still quite like the way they look.
Ok, so I have the floor in pretend slate and the walls are still flowery. Time to tackle the countertops. I was watching HGTV one day when I saw Christopher Lowell paint countertops. I had to do it. My countertops were bright blue, I dreamed of a neutral countertop. So, I primed the countertops, painted them cream and applied many layers of polyurethane to them. They looked beautiful (to me). Shortly afterwards I found some decorative vintage tiles at an old farmhouse store in Pennsylvania. I laid the tiles onto the countertop so that I could put hot pans and things onto it. I loved the uniqueness of them. I later went on to attach them directly to the countertop (crumbs were always getting caught inbetween them and we had become home to about 3 million ants). As an afterthought I also bought two large marble tiles and glued them to the little countertop next to the stove - they were great for putting hot pans on and were very easy to clean.
It was during all these exploits that I realized one of my favorite things to do was to decorate as much as I could with as little money as possible. When I added up what I had spent, it was barely anything. Most things just needed a little creativity, some planning and time.
I continued with the kitchen. The wallpaper had to go, I wanted to create a serene kitchen that was functional and pretty but did not draw attention to it's many, obvious flaws. I decided to paint over the flowery wallpaper. I had a small painting in the living room that had a border of dark green paint. I loved that green, and decided that if I hung the tiny painting in the living room it could be a suggestion of the color that was also in the kitchen. I color-matched the paint and began to paint (without primer). Yes, it bubbles up and yes it took a lot of paint. But, if you wait a little bit, or pop it with a pin, the bubbling subsides and you can flatten the paper out. Obviously I would never recommend doing this in a large area or an area with a very bright color on the wall. The dark green covers a lot of flaws and is very forgiving in the kitchen.
When it was done I hung up some old back and white photographs and admired what I was beginning to create. The photographs stood out nicely against the green and the cream countertops balanced well with the cabinets and the floor.
My next adventure with the kitchen was the cabinets. I have two dreams for my kitchen. Well, more than that but I'll tell you the first two. The first one is to remove the cabinets that flank the window and put up open shelves instead. The second idea is to remove the cabinets altogether and to make an entire wall of windows. As I thought about these options I knew that what I could do in the meantime was to remove the cabinet doors to give the illusion of open shelves. So, this is what I did. I lived with this for a while but then I decided it just looked like I had removed the doors on the cabinets. Not exactly what I was looking for.
At this point I needed to stop and think a bit, my kitchen had to remain functional while I experiment with my ideas. What I came up with was to paint all the upper cabinets cream, remove any dated moldings and replace the hardware. I decided I wanted to try and develop a bespoke kitchen, one that looks pieced together over time. I wanted the kitchen to appear as big as possible and I wanted to make the oak cabinets as quiet as I possibly could without actually replacing them.
So what I did was buy (on ebay) glass knobs for the upper cabinets and wooden, unfinished pulls for the bottom ones. I stained the wooden ones to match the cabinets. I went ahead, primed and painted all of the cabinets (note: don't use water based primer on something that you really need to be durable, I had to redo the entire kitchen with an oil-based primer as the water based one could be scraped off easily). I removed several pieces of molding that I didn't like, painted the flowery walls behind them and I put the new hardware on the cabinets.
When it was done I was so pleased with it. The green, cream and wood blend together nicely and the glass knobs on the cabinet give an unexpected lightness to the cabinets.
You may think I am done at the moment, but I'm not. I now have my eye on some original dark red linoleum for the floor, and, despite frowns from some kitchen designers, I am still thinking of marble or stainless steel on the countertops. Not to mention that I want the wall above the stove knocked down and some cabinets removed and a free standing pantry..............
No comments:
Post a Comment